Mobile, high density shelving. While this installation is located in a college library, there could be specific procedures for librarian use of stacks.
Considerations for compressed shelving:
Safety, lighting, temperature control
Some of the collection could be mobile in shorter shelves.
Concerns: safety, mobility, adequate lighting.
Taller shelving can create nooks, reading lounges and interesting spaces.
Concerns: safety, lighting.
Tucking shelving under dropped ceilings:
Shelving could be tucked under dropped ceiling areas with fascia boards to integrate the shelving into the space.
Flexible Spaces:
Dividing space while still letting natural light infuse the space.
Called huddle spaces by the industry. This image made me think of the 8th grade trip last year to the YMCA camp where the garage doors brought light and beauty into the Gym space.
Re-imagining existing spaces:
Under the spiral staircase in lower library
(although on a much much smaller scale. Water and power exist on other side of wall, right? Hot and cold?)
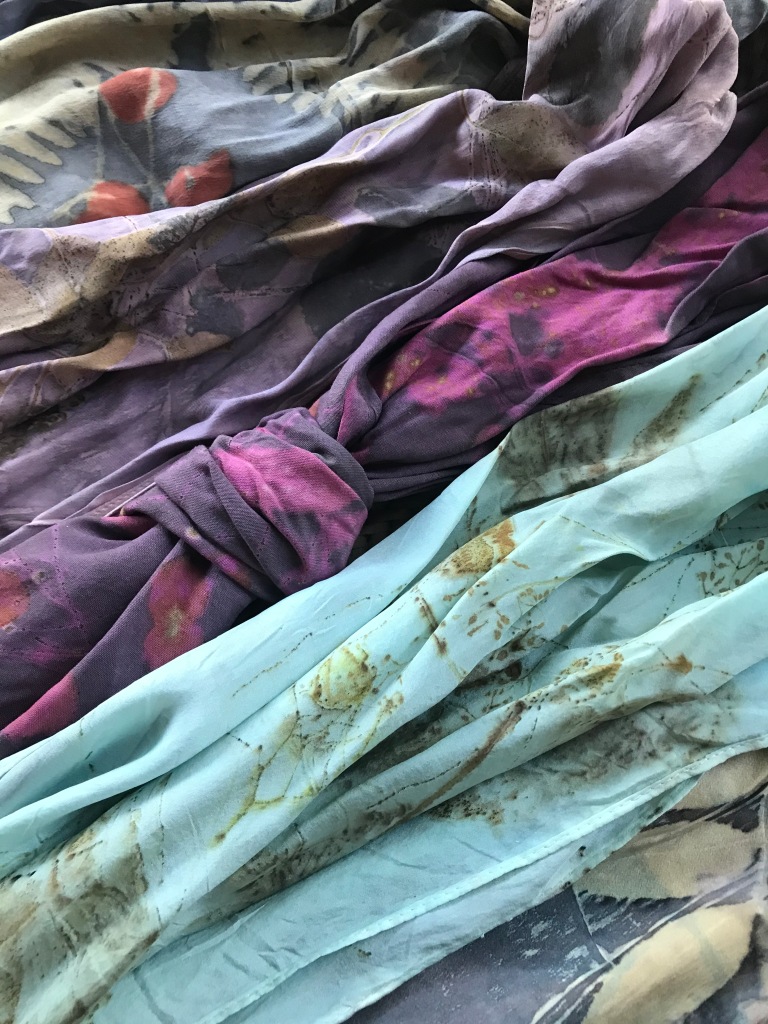
What is it?: Ecoprints are the result of color being deposited on fabric or paper. Plants provide natural dyes that are released through steam or a hot water bath, leaving an imprint of the plant on fabric.
Once plants are gathered, the leaves are placed on the paper or fabric. Designs can be random or orderly – it’s all up to the artist. When the design is complete, the fabric is rolled up and heated to release the dye from the plant material onto the fabric. Steam, boiling or simmering water are the current methods of releasing color to the fabric. The most exciting part is unrolling the projects. Each print will be unique.
Materials
Provided for you:
Fabric: New white cotton fabric that has been scoured to remove sizing and fabric treatments. And, some new cotton fabric that has been treated (more on this later) to absorb the natural colors from nature.
Colorants: Onion skins. Tumeric powder.
Supplies: Cotton string for wrapping bundles and hanging pieces to dry, dowels for wrapping fabric around, clothespins.
What you will gather:
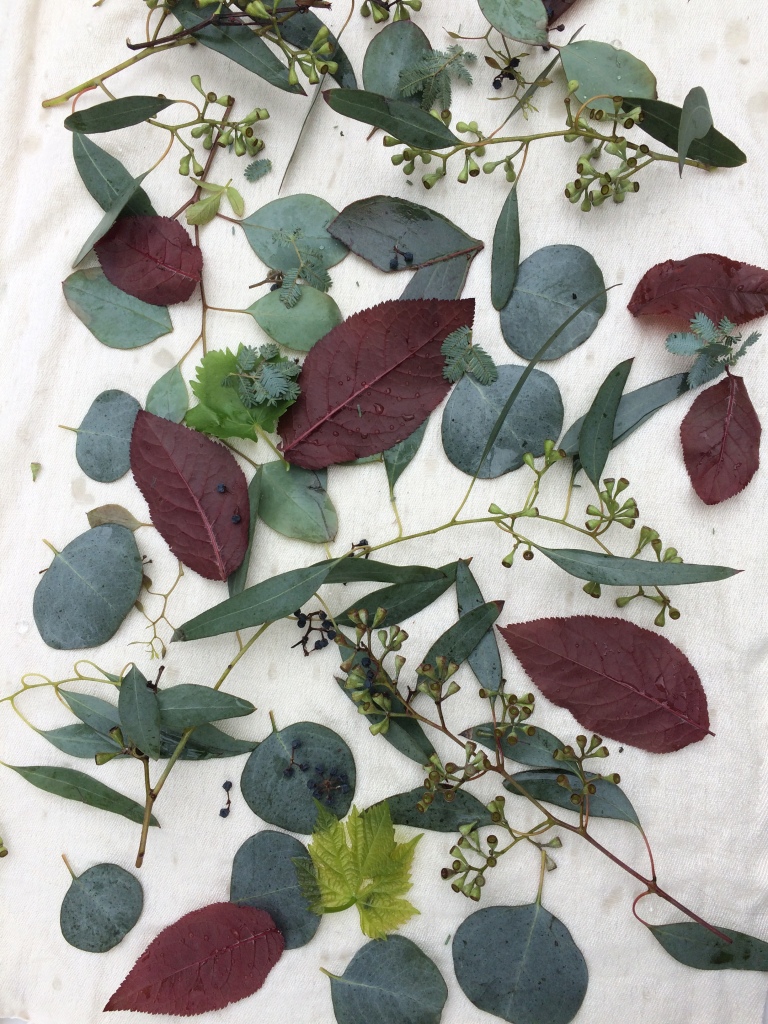
_ Plant materials (list and links below)
_Plastic sheeting, heavy trash bags, or plastic shower curtain
_Workspace. Maybe part in the kitchen for boiling or steaming. If you have an outside burner (connected to a BBQ, a propane turkey fryer, free standing camp cooktop) you will be able to work outside. Outside or garage space for gathering plant materials. A work table or clear space for rolling up the bundles. A place to string a clothes line to dry fabric on. Color may drip from the fabric while drying, please consider this when planning for the clothes line.
Materials list – expanded, explained.
Clean, washed cotton sheets (older the better! ) or old t-shirts that have been washed (the older the better – holes, yes! stains, yes! these are to protect the plant dye from transferring through the rolled layers).
Buckets: Homer buckets are great for rinsing. One is good. Two are better.
Inexpensive shower curtains, plastic sheeting or heavy 33 gallon trash can liners (Target has inexpensive shower curtains, Home Depot and Ganahl Lumber stock plastic sheeting – heavy trash bags will work also). This will protect your driveway, work surface or garage floor. A layer under the clothesline is a good idea too.
Scissors, masking tape, paper or small notebook for process and plant notes, a bottle of vinegar.
Tongs and heatproof gloves or garden gloves to protect your hands when removing bundles from the dye-pot. The bundles really retain heat and both bundles and water are very hot. Use caution!
Trash can for plant materials, some zip lock bags big enough to hold your bundles while they cure.
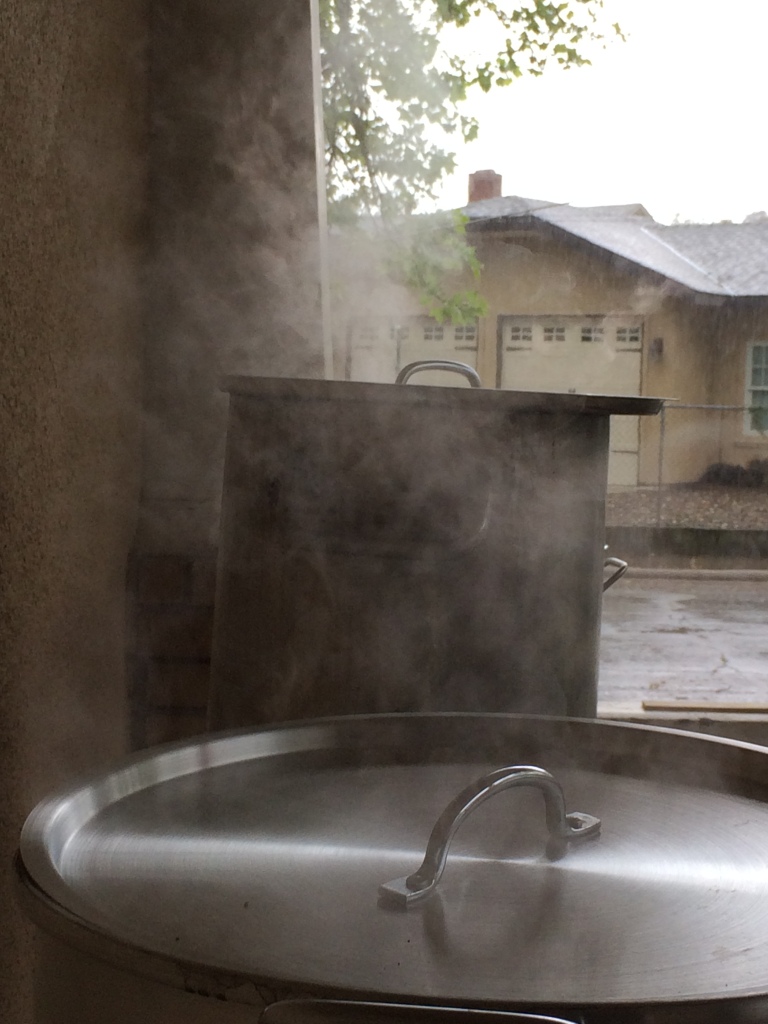
Stainless steel pot (the bigger the better) you can dedicate to ecoprinting. It’s referred to as the dye-pot. Aluminum will work, but will change the colors you get – which is not a bad thing, just different. Need a pot? Please let me know. The width and depth of your pot will determine how long your fabric bundles can be.
Misc. and optional: rubber bands, binder clips, coffee (not the good stuff!) and black tea (again, save the good stuff for drinking!)
Process
Cautions:
Ecoprinting involves collecting plant materials. Care must be taken to correctly identify and handle the plants, avoiding toxic and poisonous plants. There are links below to help identifying useful plants as well as plants to avoid.
Once plants are collected, they are wrapped and heated to encourage the release of naturally occurring colors. There are a few ways that effectively release color: steam and water baths involving hot or boiling water. Risk is involved. If you’d rather have me process your ecoprints, I’m happy to do that. In fact, if you have any doubts at all, please let me process your prints. You will be able to design your prints, roll them and wrap them. Once you deliver your fabric bundles to Prep, they will be processed. After that, you will be able to pick them up from Prep. You will still get to unroll the prints yourself – because that’s the best, most exciting part. And share them with us!
EcoPrinting at home. Onion skins and Tumeric are safe to process at home. The cotton fabric for at home ecoprinting has been washed and scoured to remove sizing. The best practice for ecoprinting is to dedicate a stockpot-referred to as the dye-pot – even though the materials are “safe.” The wooden dowels are untreated, and the string is 100% cotton.
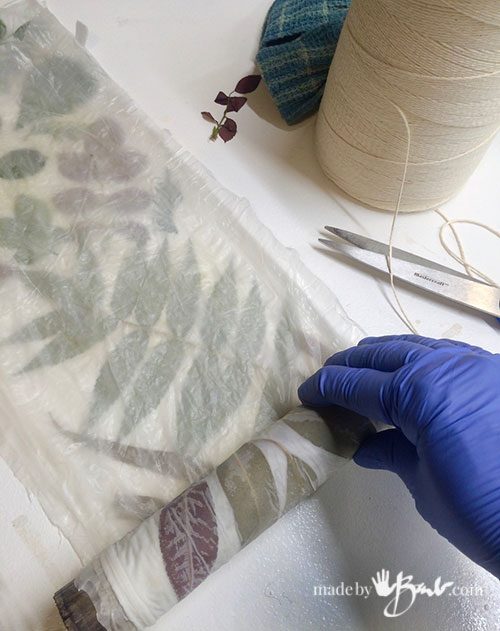
Making the fabric bundles After collecting plant materials, make a sandwich. The sandwich has three layers. The bottom layer is the blanket (an old sheet or t-shirt) which will protect the plant dye from printing through to the other layers of fabric. The middle layer is the fabric to be dyed. The top layer is the design created by the plant materials. The sandwich is then rolled up – like a lavash roll up. Rolling firmly and tightly is the key to successful printing as the plant material will be held in place and can print with lots of detail. Then the roll is bundled tightly with cotton string.
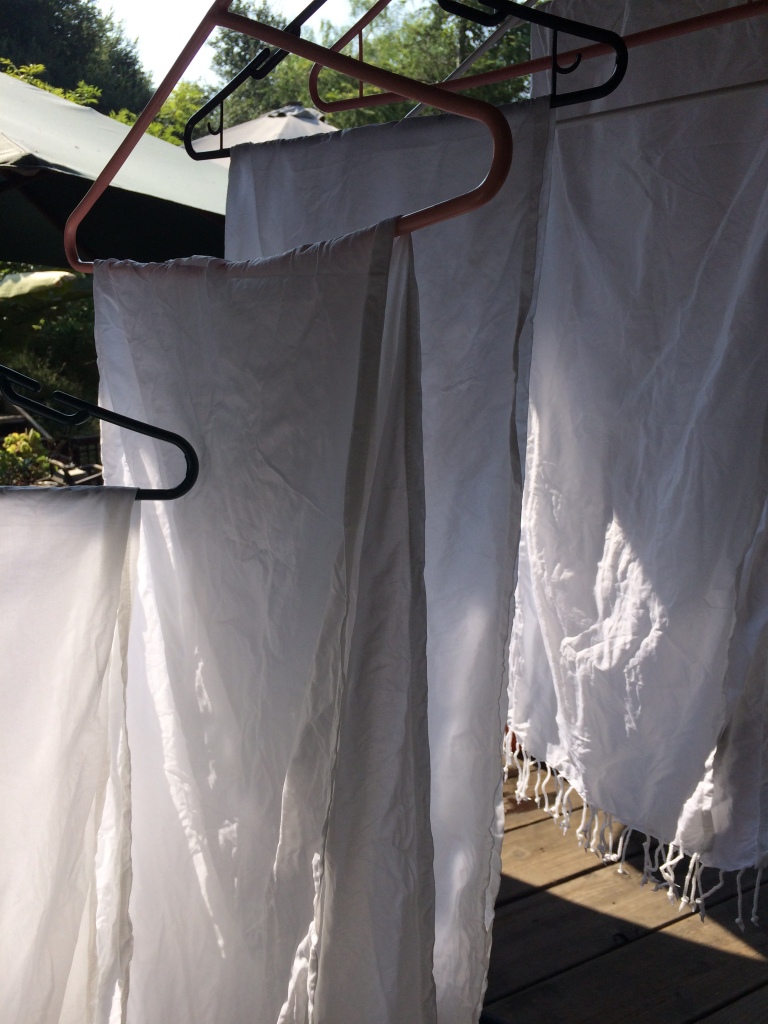
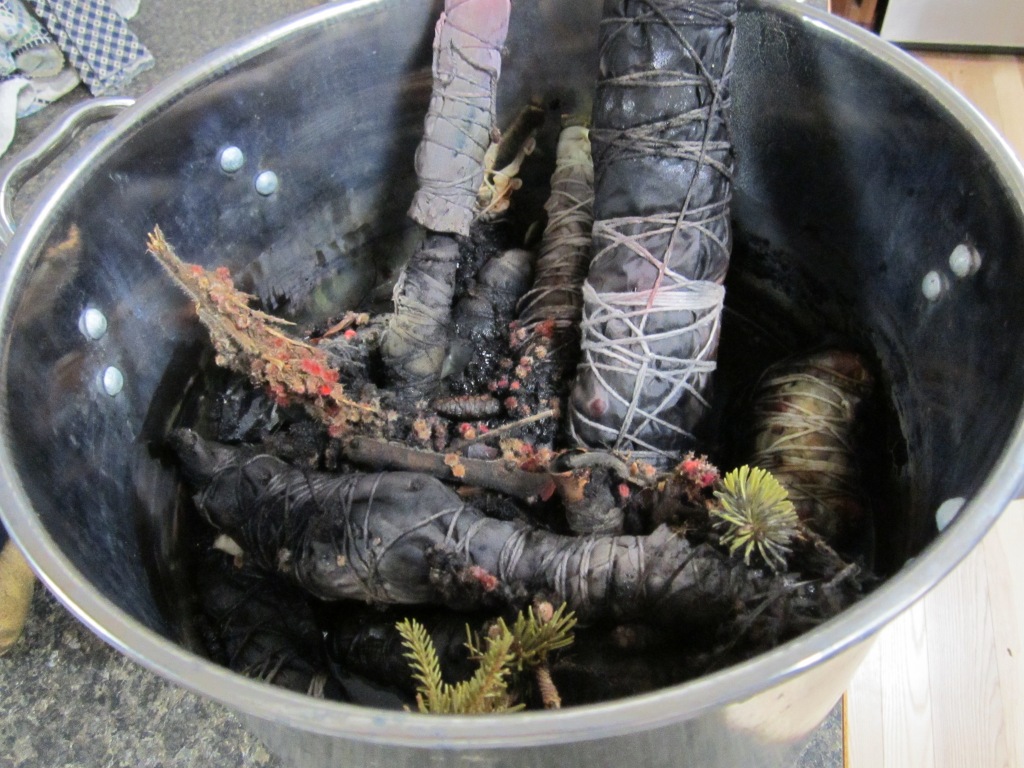
Heat processing the bundles. Most plant materials, except Eucalyptus, benefit from a water temperature of just under boiling: a slow simmer. Timing isn’t crucial here, but the least amount of time I’ve heard of for simmering the lavash bundles is an hour. After the heat treatment in the dye-pot, remove the bundles from the water and let them cool. They will be very, very hot! Use tongs and heat proof gloves. Tip: keep the bundles oriented vertically, and hold them from the top so that the hot liquid does not drip/drain down your arm. You’ll want to peek at the bundles, but from experience, we’ve learned that letting them cure for a day or two intensifies the color. Packing the cooled bundles in zip lock bags will keep the moisture in. When it’s time to unroll the bundles, grab a trash can for the plant materials and work over your plastic. The plant material will go everywhere, even if you are careful. Once you’ve unrolled your bundle, you’ll need to rinse your fabric in mild fabric soap. This is where the Homer bucket comes in. Maybe even a second one for a thorough rinse process. Pin your fabric art up to dry. Some residual color may come off your print – and it’s a good idea to choose the best location for the clothesline ahead of time.
Other options: If you’ve decided to be a bit more adventurous, there are several other ways to ecoprint using safe materials at home. One way is rust. The caution here is that rust stains. Carpet. Clothes. Stone tiles. Driveways. But it produces unparalleled prints. The leaves and flowers turn charcoal colored and the background a lovely tan color. The prints are detailed and precise. To obtain a rust bath you’ve got to collect rusty things, or make rust. Rusty things can be added to the dye-pot and processed as usual. If you have been out scouting for plants and have encountered a Eucalyptus tree that is shedding its bark, and if you have permission, grab some. It makes a beautiful warm gray colored background.
Gathering Plant Materials
A word about obtaining plant specimens: grocery stores are a great source for plant materials. Trader Joe’s can be counted on for reasonably priced eucalyptus and flowers. Plants in your own backyard are potential candidates, too. Before removing plants from your neighbor’s yards, send them an email, text or give them a call to gain permission first. In my experience, explaining that you are creating an artwork is helpful and letting folks know when you might be dropping by to carefully and thoughtfully take a few leaves helps keep neighborly relations healthy and happy. Follow up with a photo of your work, if you’d like. Please don’t remove plants from public areas.
A to Z plant resource for EcoPrinting. With descriptions and pictures here.
Using an “iron Blanket” and using a piece of iron to roll bundles around here.
Made by Barb. A wealth of information about ecoprinting. Barb is a generous teacher.
Botanical Color at Your Fingertips. Rebecca Desnos. Organic, vegan approach to dyeing with plant materials.
Eco-Dyed Art Journals: Using Nature’s Imprints. Susan Brooks. Lots of photographs, features dyeing paper. Good information on using rust/iron.
The Modern Natural Dyer: A Comprehensive Guide to Dyeing Silk, Wool, Linen and Cotton at Home. Kristine Vejar. Complete information to take skills to the next level.
Ecoprinting in a dedicated microwave: EcoPrinting in your microwave: In the future, if you are planning to upgrade, and your old microwave still works, consider using it as an artist’s tool. Microwaving ecoprints is fast and efficient. The caution here is fire. Dry leaves and paper in the microwave create sparks. Keeping the paper or fabric wet will alleviate this concern. Also, a good heat sensor keeps tabs on the temperature, and you’ll want to be present during all of the microwaving process. Here is a great resource for microwaving on watercolor paper and here is a great post for microwaving fabric. Although the artist in these posts uses recycled plastic for her bundles, I like to enclose the whole package in a ziplock bag. This helps retain moisture (reducing the chance of combustion and fire in the microwave) and saves clean-up. Please do all processing of ecoprints in a space with lots and lots of ventilation.
Shibori
Always wet your fabric. 30 minutes in plain water. Gently squeeze out water. Roll in a clean towel.
Fold, scrunch and tie, or roll fabric over dowel and tie.
Here is a link to two kinds of wrapping in this video: one type is over a rope and the second over a pvc pipe, or you could use your dowel. The language is not English, but you will be able to follow the visual instructions.
This is a good website for square and scrunched folding.
Here are directions for chevron fold:
Preparing your dyebath:
gather materials
large pot, string, clothes pins, water source, heat source, bucket, dye (either tumeric or onion skins)
wet fabric
either roll on dowel and scrunch and tie, or fold and tie or rubber band. You can choose not to tie the fabric.
put water in stockpot and add dye: for onion skins: add half your amount.
for tumeric: add about 2 tablespoons.
Bring to just under boiling (don’t boil – turn down heat to low when you see tiny bubbles at the surface).
add fabric.
keep the dyebath just below boiling.
after 30 minutes, turn off heat and let fabric cool in dyebath
next day: remove fabric, untie, and rinse.
use a little dishsoap to rinse out color – do this in your bucket!
hang on your clothesline to dry.
Cyanotype Printing
Chemical reaction:
The relatively-high energy photons from blue and near-UV light are sufficient to initiate a photochemical redox reaction wherein iron(III) is reduced to iron(II), while the citrate is oxidised to 3-oxopentanedioic acid:
Despite the fearsome-sounding name, both the hexacyanoferrate compound and the resulting Prussian blue are low hazard. The same complex stability associated with the ligation of the cyanide ligands to haemoglobin and the resulting toxicity renders them unavailable for release from the compounds encountered in this experiment. Indeed, the ease of production and stability of the blue compound meant it was in use long before the cyanide ligand had been identified, which is how the latter would later acquire its name from the Greek word kyaneos, meaning ‘dark blue’.
A good article on history and safety when mixing chemicals yourself here.
Cyanotype on fabric:
Determine right (put prints on this side) and wrong side.
In a room without sunlight, or at night:
Draw a small square (pen is good) in the corner of your fabric – about 1″ square – mark the square with the letter G. On the same side of the fabric, right next to your square, write the letter G just outside of your square box.
Cut out your square. Keep your square and your fabric dark until you are ready to test the fabric.
Test your square. On the side with the G on it, place a leaf, scrap of paper, or small item on the square and test it in the sun.
Does the fabric change color?
if it does – the G is the right side of your fabric: it will face the sun. It will have leaves or flowers on it when you expose it.
if it does not: flip the square over and try the other side. If this side prints, then use the other side of the fabric to face the sun.
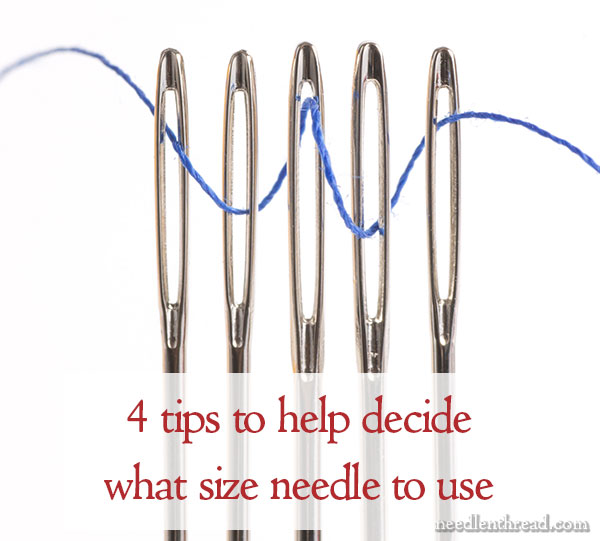
From Mary Corbet’s website: learning to “hear” your hand sewing:
Needle Size & Thread Weight
Experienced embroiderers generally acquire a feel for what size needle will work best in specific stitching situations.
Here are four tips to help you decide what size needle to use:
1. The needle should be able to pull the thread (including the doubled thread near the eye) through the fabric fairly easily, without allowing too much abrasion on the thread as it passes through the fabric.
The rule of thumb that I always heard growing up is that the shaft of the needle should be about as thick as the embroidery thread. But the only situations where this really works are in counted techniques, needlepoint, stitching on open weaves, and any other time there’s already enough space between the fabric threads for the needle to pass through easily. For surface embroidery, you have to consider not only the thickness of the thread, but also the thickness of the thread at the eye where the thread is doubled, and the weave of the fabric. A tighter, close weave is going to require a needle that can make the right-sized hole for the thread and the needle to pass through.
2. Although you may hear a pop as the needle passes through the fabric (the pop is usually most evident on very taut fabrics), there should be no real resistance in the fabric when pulling the eye of the needle through. If there’s resistance – if the fabric is pulling and denting, and you really have to fight to get the needle through – that’s a sign you should be using a larger needle.
3. Although there might be a soft noise as the rest of the thread passes through the fabric, there should not be a loud zipper noise. If the thread makes a loud zipper noise and you can feel resistance as you pull the thread all the way through to the end of the stitch, chances are, your needle isn’t big enough.
4. The hole the needle makes should be large enough for the thread to pass through, but not any larger. The needle should not leave a visible hole around the thread.
Keep in mind that there is no absolute formula or rule for what size needle to use for specific threads. While general suggestions might be made, the selection of the needle is often based on personal preference – what needle are you comfortable with in this stitching situation? Over time, it becomes second nature to know what size needle will work best.
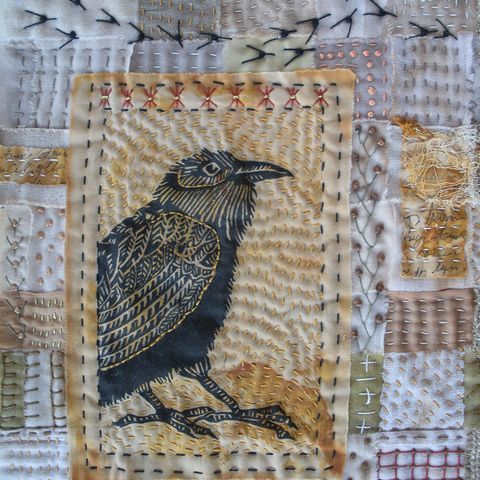
While this is text, is packs a ton of great information. It’s a compilation of tips and advice from Natalie Chanin, the founder of Alabama Chanin.
You’ll see stem stitch, leaf stitch and lots of stitches that add texture and volume.
Satin Stitch covers with pure color.
Padded Satin Stitch: for raised shapes
3-D roses with cool technique.
Writing script letters
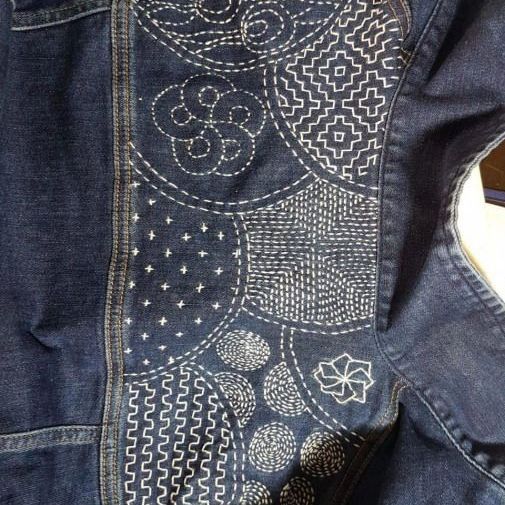
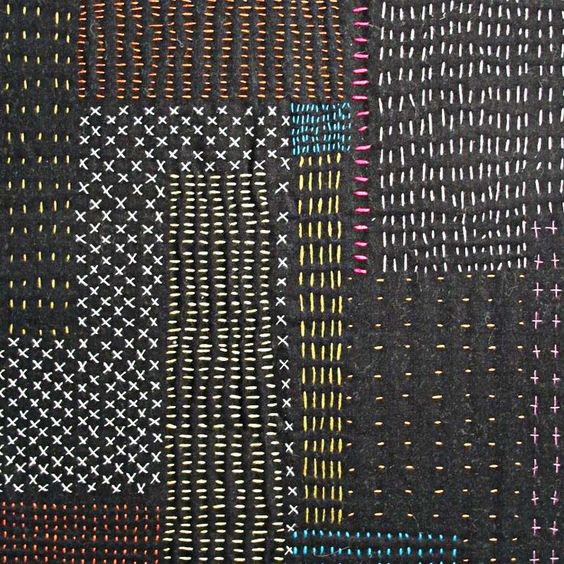
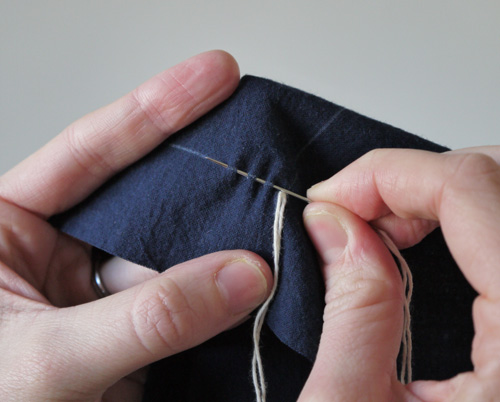
How to’s: Boro and Sashiko
Getting started: check here for useful information for new and seasoned sashiko and boro stitchers.
Watch this for the ideas and the techniques. Repair fabric positioned inside of jeans. Can be enjoyed with sound off.
Using traditional Japanese fabrics for patches on outside of jeans.
Freeform Boro stitch repair on jean jacket
History of Sashiko and brief lesson on preparing fabric and stitching here.
Help with how to begin, holding your needle, stabbing the fabric, following a pattern can be found here.
Sashiko uses the same method of pushing fabric onto the needle as Boro stitching, but has a different purpose and history. One thing to note is that sashiko can have definite pattern pathways and steps. Lining out your pattern is the key to creating a precise design. Transfer paper is helpful for this. Here are some free patterns to download and transfer.
The following tutorials are from Arounna Kounnoraj artist, designer, entrepreneur and believer in our capacity to create while sustaining our environment.
Mending knitted things: socks and sweaters. Here is a video from Arounna’s Instagram. And here is a link to blind-stitch mending. Darning on a sweater – tips for working on stretchy fabric.
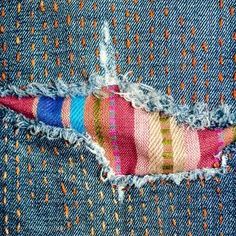
Reverse applique is a cool technique if an area of fabric is missing or too worn to stitch together. These embroidered patches are another way to cover where fabric is not available to mend.
Embellishments
Personalities, history and amazing stitching
Enjoy this librarian/artist’s profile and examples of her work.
Adapting service strategies and the library collection to meet the needs of young adult patrons in a school setting.
What are the best resources?
What are the best practices for delivery of services?
There are no unequivocal answers. 35 librarians will give you 35 answers.
Then, how are decisions made?
It’s pretty much a balancing act.
A school library is like a little business. You have products (books) and services (help finding and using resources). You pay bills, keep within a budget, order books and non-books, fix stuff, pick up stuff and even take out the trash sometimes.
Add in: meet and greet with 520 students. As many as 100 per hour.
Add in: meeting and collaborating with faculty.
And, tailoring the collection for both personal needs (being an adolescent) and academic needs (getting stuff done for class).
But also, instruct in ways to avoid plagiarism, find good sources, use stuff ethically, consider copyright.
Do all of this in a constantly changing environment, technologically speaking.
Throw in keeping good relations with volunteers, parents and administration and you have the makings of a balancing act.
Know your environment.
Who are your students?
Boys, girls or co-ed?
What grade level? K-8? Middle School? High School?
Religious school? Private school? Public School? Special School (eg. High School for the Arts?)
How is your role defined?
Will you be expected to collect, organize and catalog?
Will you be expected to work collaboratively with faculty in developing research projects and writing assignments that involve research?
Will you help students create multi-media creative projects?
Expectations….
What are your administrator’s expectations?
Are they cutting-edge, pro-technology?
Or stuck in the 1950s?
Do they support your vision (or even know what your vision is?) (Do they know what you do every day?)
What are your expectations?
Who, exactly, are your stakeholders? Who do you serve?
Teachers? Students? Staff? Board of Trustees?
Get involved in “the network”
of librarians!
Listserves, blogs, wikis, Nings,
associations (ALA, CSLA, BAISL)
Advantages:
Develop your collection
Find out about trends in curriculum
(eg. History and movement toward experts and primary sources and away from encyclopedias)
What’s new (and sustainable) in technology
eBooks, eReaders,
Jobs!
Changes in educational philosophy
Copyright, fair use,
plagiarism (avoiding it, policies about)
And all manner of questions (and answers) about best practices and resources
Resources, links: at the end of this post.
Building a collection: it’s not like it used to be…..
Podcasts
Streaming video
DVDs
Books
Databases
eBooks
eReaders
Tutorials
LIBguides
Once you know what is appropriate for your setting:
Look at reviews
Start a book club (interest driven and exchange of ideas)
Look at other librarian’s blogs
Websites with teen reviews (and teen writing)
Non-fiction: need both interest driven reading (hobby, career) and life topics.
In an effort to organize the universe, we sort. But why do we sort? To find. To understand. To differentiate.
pajama sorting at the Tucson Savers
How is your closet sorted? By type of clothes – sports, work, gardening? By color? Season? Favorites at the front, less favorites on the floor way in the back? How fast can you find what you are looking for in your closet? Retailers would like you to find what you want right away at their store. Sometimes, sorting sidles right up next to marketing in a retail setting, answering the question, “How can we get our product in your hands within 3 minutes?”
the wall of shoes at the Tucson Savers
A sorting system can use multiple ways of organizing. This wall of shoes ran almost the entire length of the Savers store in Tucson – and was a visual feast of color, pattern and geometry. But when you are looking for shoes, what is the most important parameter of your search? Size.
the perfect shoe in the right size
And what a joy to discover that at Savers, searching the 100+ foot wall of shoes is manageable because sorting is both by style and size. Amazing. And profound. Making the search process user friendly. It was the take-away lesson from the friendly folks at Savers: make it easy to search – and find. Keep a presence in the mind and heart of the user, anticipate their needs and keep the solutions simple.